Web Developer
Bubble.io Option Sets Bulk actions | Import | Export | Edit
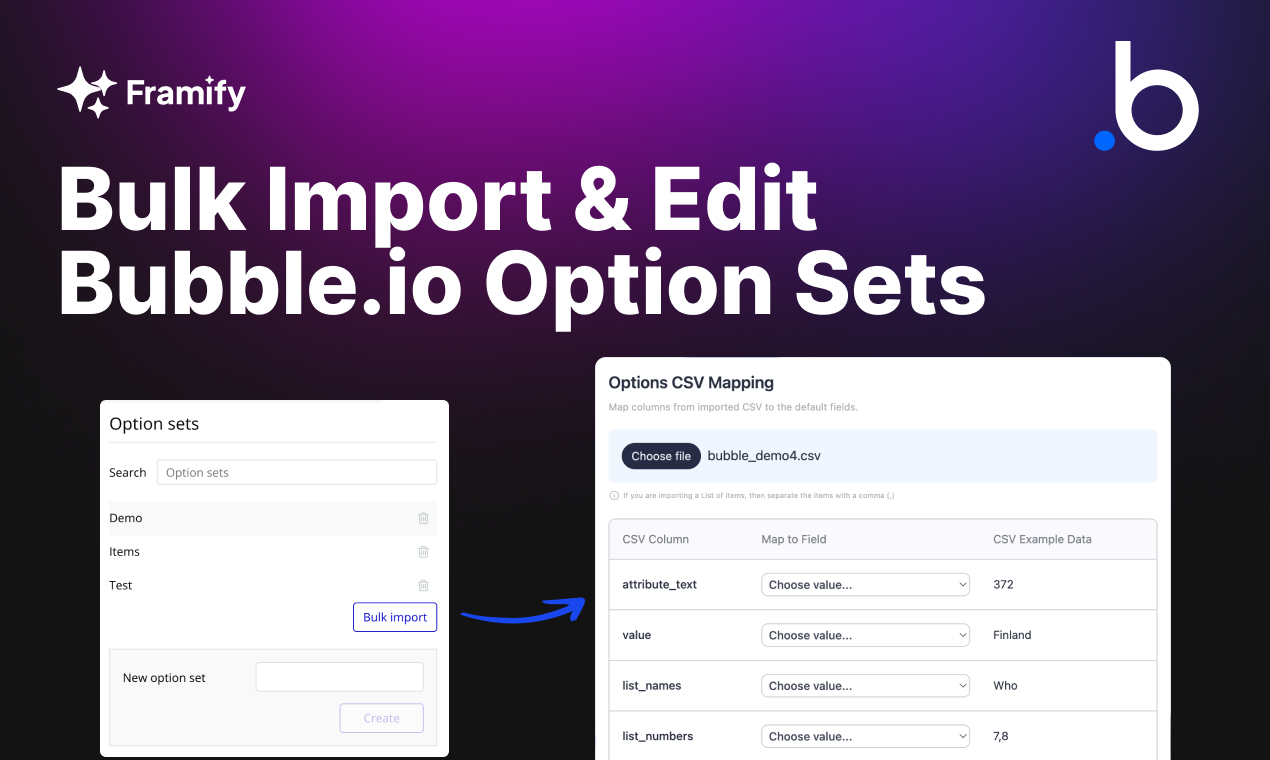
Framify.io's Bulk Actions feature for Bubble.io provides a simplified way to manage option sets. Import new data sets with attributes, export for modifications, and overwrite existing data effortlessly with our CSV file process.

Importing New Option Sets with Attributes
Our Bulk Actions tool allows you to import a completely new option set with attributes directly into your Bubble.io app. Here's how you can do it:
-
Prepare Your CSV File: Ensure your data is organized with headers for easy mapping. You can include various data types like text, numbers, dates, and lists (except geographical addresses). Header(column) values should not include empty spaces
number listnumber_list -
Upload and Map Your Data: After saving your file as a
.CSV, upload it to Framify.io. You can then map each column to the corresponding data type in your Bubble.io app, including unique attributes. -
Efficient Data Handling: Framify.io simplifies the import process, allowing you to easily integrate complex data sets with multiple attributes into your Bubble.io application.
Preparing your data
1. Create an excel file with the data you want to upload
- all column names should be in snake_case (as bubble will convert it), avoid special characters
- avoid the following names: “name” , “description”, “sort_order”, “ID”, and “delete” as these are system fields used by bubble
2. Sort the table in the order you want (optional)
- Framify will automatically add a field called “sort_order” that will match the order of your file
- You can add this field manually

3. For lists, separate each item with a pipe |
4. For any foreign keys, make sure you use the db_value from the other tables
- if you need to link this option to other option sets in the future, then you should create a column called
db_valuewhich will be the “primary key”, and that can be used later in other files to create relations.db_valuemust be in lower caps- ideally, use the same as the display, but in lower case (for example: USD → usd)

5. Save it as a file as a CSV file
Simple imports
1. Import your CSV file as a new option set

2. Check the mapping
- map the main field as “display” (in this case, the ISO3)

Complex imports
1. Create a new option set manually, adding each field manually
- don’t create a
db_valueorsort_orderfield - recommendation → put your columns in you Excel file in alphabetical order, it will help you merge files later on (since the columns in the exported file will be in alphabetical order)

2. Add a first option manually in your option set
- make sure you populate each field manually, especially lists and foreign keys

3. Download this option set using the “Export” button
- download in the Excel (XLSX) format to be able to edit it easily
- I call it
country v1 download.xlsto help me keep track of the download→edit→upload steps, as you may need to do this several times if it does not work immediately. - double check that the lists work
- double check that the foreign keys have the right db_values

4. Fill in the file with the data from you master file
- don’t fill in the ID field
- do fill in the
db_valuefield - fill-in in the
sort_orderis optional (if you leave blank, it will create a sort order matching the order in which you entered the data)

5. Save your excel file for future reference
- eg.
country v2 edited.xls
6. Save it as a CSV file, ready for upload
- eg.
country v3 upload.csv
7. Double check your CSV file, and remove empty lines at the end

8. Upload the new CSV file with the new records (make sure to add the db_value column) using the “Existing” button
- make sure you add the names of all the columns that contain lists, separated by commas
- don’t put a space between each column name

9. When you review the data before import, make sure that the “|” have been replaced by commas. If not, that means that it is not recognising it as a list.
Exporting Option Sets
Framify.io's Bulk Actions feature also includes a powerful export function, allowing you to seamlessly transfer your existing option sets into an Excel file for review or modification.
How to Export Option Sets
-
Simple Export Process: With just a click, you can export your current option sets from Bubble.io into a manageable Excel format. This makes it easy to review your data outside the app environment.
-
Selective Data Management: If there are certain option sets you do not wish to modify, you can simply remove those rows from the Excel file. This flexibility allows you to focus only on the data that requires your attention.
-
Preparing Data for Re-import: After making the necessary changes or additions to your data in Excel, ensure to maintain the integrity of the ID and database value columns. These columns are crucial for consistent data management and should not be altered.
- AI Generated Option Sets: If you wish that AI would to the hard work, then simply click on "✨" icon and give AI description of the Option Set you would like to get - easy as that.
Importing & Overwriting existing Option Sets
Once you have exported and modified your option sets, Framify.io makes it straightforward to overwrite the existing data in your Bubble.io app with updated information.
Steps for Overwriting Option Sets
-
Adding New Values: If you're looking to add new entries to your option set, simply include a display column and any relevant attributes in your Excel file. Remove all other data that does not require modification to simplify the re-import process.
-
Handling Date Types: For those working with date types in existing option sets, it's important to use specific formulas in Excel for accurate data translation. For date values without a timestamp, use the formula
=({row}-DATE(1970;1;1))*86400000. This converts the date to a Unix timestamp format, which is required by Bubble.io for proper data handling - if you are importing a completely new Option set then this step is not required. -
Re-importing with Accuracy: After preparing your Excel file with the new or modified data, save it as a
.csvfile and upload it to Framify.io. The platform will ensure that your data, including all modifications and additions, is accurately reflected in your Bubble.io app. - ID & db_value: When re-importing data, you may change every attribute & display value columns except for ID & db_value columns. If you are adding new rows then you may add custom db_value (if left empty, it will be auto-generated), but make sure anything else does not have the same value ( ID must be left empty for new rows, always ).
- Sort factor: When adding new rows & importing new data, please fill the sort_factor row in a incremental order.
Additional Tips for Effective Data Management
- When dealing with lists, separate items with a pipe for clear distinction.
- For date columns, ensure the format is consistent with the Unix timestamp used by Bubble.io, when reimporting existing Option sets.
- Take advantage of Framify.io's guidance on mapping regions and other relational data.
Conclusion
Framify.io's Bulk Actions for Bubble.io option sets offer an unprecedented level of control and efficiency in managing your app's data. Whether you're importing new data sets with multiple attributes, exporting existing ones for review, or overwriting data for updates, our tool simplifies these processes, saving you time and enhancing your app development experience.
Embrace the power of efficient data management with Framify.io, and transform the way you handle data in your Bubble.io applications.
Also big thanks to Fabrizio Nastri for helping Framify to create the tutorial.
 Leer en
Español
 Leia em
Português


